Using an equipment checkout form can help you manage your rental inventory more efficiently. A well-designed form makes the checkout process easier for customers, reducing the chances of rental attempts being abandoned because of a cumbersome booking process.
Any detailed checkout form lays out the expectations for both parties to ensure the experience is as smooth as possible. These forms also help you keep track of your rental inventory and prevent potential losses.
Equipment Checkout Form Template
A well-put-together equipment checkout form allows you to collect customer information and equipment usage data, then easily transfer that data to a database.
From there, you can track who’s checking out what, who’s using what, and when it’s due back. This insight creates additional sales opportunities and protects your bottom line. Here’s our free equipment checkout form for your rental business.
Download Quipli’s Equipment Checkout Form Template
Why Equipment Rental Checkout Forms Are Essential
Equipment checkout forms are more than just paperwork—they’re a critical part of running a profitable rental operation. Without a standardized checkout process, rental businesses open themselves up to disputes, lost revenue, and operational chaos.
Here’s why every rental business needs a solid checkout form:
Accountability and loss prevention
A signed checkout form creates a clear record of who has your equipment, what condition it was in when it left, and when it’s expected back. If a $40,000 skid steer goes out without documentation, you’ve got no recourse when something goes wrong.
Dispute resolution
When a customer returns a mini excavator with a cracked windshield and claims it was already there, your checkout form—with documented pre-rental condition—is your first line of defense.
Consistent customer experience
A standardized form ensures every customer gets the same professional experience regardless of which counter person is working that day. This consistency builds trust and keeps customers coming back.
Regulatory and insurance compliance
Many insurance policies require documented rental agreements. If you ever need to file a claim for damaged or stolen equipment, a complete checkout form can be the difference between a covered loss and a denied claim.
Operational visibility
Checkout forms feed data into your broader business operations. When you know what’s going out, what’s coming back, and what’s overdue, you can make smarter decisions about fleet size, pricing, and utilization.
In short, a checkout form isn’t just a form—it’s the foundation of a well-run rental operation.
What to Include in an Equipment Checkout Form
An equipment checkout form needs to include information about the equipment being rented and to collect key details from your customer.
Collecting information for equipment checkout can be a delicate balance. You want to get as much information as possible while keeping the process as easy as possible. The less your customer has to type or think, the better your results. Create selectable options when you can, and allow for one- to two-word answers if possible.
Customer and Company Information
To start, you’ll want to collect the contact information for the person or company checking out the equipment. This data should include information about the individual authorizing the checkout and contact details for whoever will be responsible for the equipment.
A good practice is to obtain as much information as reasonably possible, such as the location of the company renting the equipment and the location (or locations) where the equipment will be during the rental period.
You’ll also want to provide your company’s contact information, such as an email address or phone number. Include the primary contact person for each piece of equipment.
Your renter needs to know who to contact in an emergency and who handles maintenance or repair questions. Ideally, you’ll have one contact person within your company who can direct things accordingly.
Equipment Details
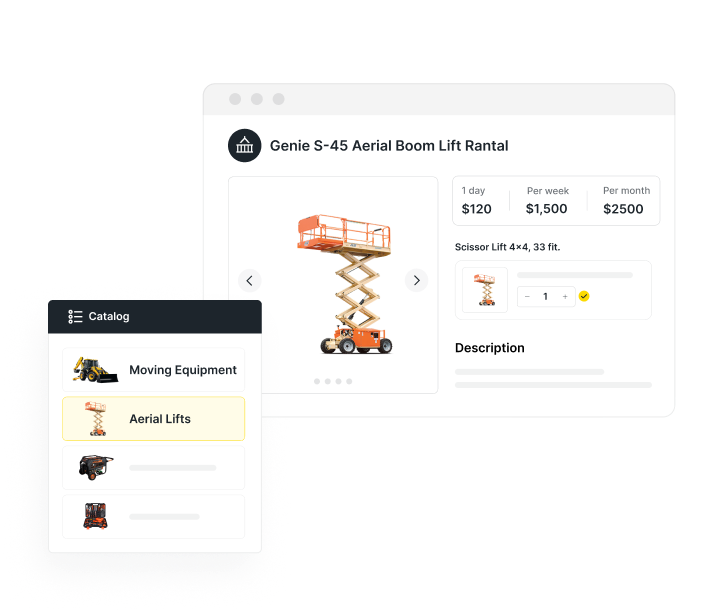
Make sure to include specific details about the equipment that’s being rented. These include the make and model, as well as the equipment type. You may also want to include a picture on the form to ensure there are no mistakes.
Other equipment-related information you’ll want to include:
- Serial or unit identification numbers.
- Internal inventory or asset number.
- Hour meter or odometer reading at checkout (for heavy equipment).
Including as many details as possible on the equipment’s condition will prevent issues with assessing potential damage. What was the condition when it was checked out? Is there any major cosmetic damage? Laying this information out helps you fairly assess the equipment upon return.
Due Date Information
You should explicitly state the due date (and time) for the equipment. By codifying the due date and time, you can ensure there are no misunderstandings regarding when the equipment needs to be returned.
For example, suppose a customer completes the checkout form on Monday morning for pickup on the same day at noon. They choose a 5-day rental period. Your return policy is that the equipment is due by 5 p.m. on the due date. You’d want to state the due date info as Friday before 5 p.m.
Information About Pricing and Late Fees
Pricing is another key detail you’ll want to lay out in the checkout form. Break down the fee structure (how fees are calculated) and outline the fees item by item.
A section on other possible fees should also be included, covering damage, cleaning, and late fees. The late fee ties directly to the due date and time.
Clearly state your late-return policy and the associated fees. For example, what do you charge if the equipment is returned later than the stated due date and time? Is the renter charged for an additional day?
Also, include a policy on giving notice when the rental period needs to be extended. If the customer needs the equipment for an extra day, when must they notify you?
General Terms and Conditions
The terms and conditions contain the fine print and legalities. This section outlines how, where, and when the renter can use the equipment. For example, you may have equipment that shouldn’t be exposed to water or used with certain materials.
This section should also detail contingencies and expectations if the equipment is damaged or lost. What are the procedures and timeframe for reporting damage? You’ll address these types of questions in the terms and conditions.
Signing and Accepting Responsibility
When accepting the terms and conditions, your customer should become more informed about the responsibilities inherent in renting the equipment.
Signing the form includes accepting the responsibility of safely operating and caring for the equipment, as well as the terms of the fee schedule. You can reiterate potential fees and penalties in the terms and conditions.
Near the terms and conditions section is the signature block. This is where the customer (or the company representative) signs, accepting the terms and acknowledging that the information on the checkout form is correct.
Customization Considerations
No two rental businesses are exactly alike, so your checkout form should reflect the specific needs of your operation. A general tool rental shop will have different requirements than a heavy construction equipment operation.
Here are a few customization factors to consider:
Equipment type
Heavy construction equipment like excavators or boom lifts may require additional fields for hour meter readings, operator certification verification, and transport logistics. General tool rentals may need simpler forms focused on quantity and return condition.
Customer type
If you rent to both individuals and commercial accounts, consider building 2 versions of your form—or a single form with conditional sections that adapt based on customer type.
Insurance and waivers. Some rental operations include damage waiver options directly on the checkout form. This is especially common for high-value equipment where the risk of damage is significant.
Delivery vs. pickup
If you offer delivery, your form should capture the job site address, site contact person, and any access instructions the driver needs to know.
Local regulations
Depending on your location, you may need to include specific legal language, environmental disclosures, or licensing requirements on your forms.
Download Quipli’s Equipment Checkout Form Template
How to Ensure Your Checkout Forms Are Accurate and Complete
A checkout form is only as good as the information on it. Incomplete or inaccurate forms can lead to disputes, lost equipment, and revenue leakage. Here’s how to make sure your forms are filled out correctly every time.
Train your team on every field
Every counter person and yard employee involved in the checkout process should understand what each field means and why it matters. If your team doesn’t understand the importance of capturing a hour meter reading, they’ll skip it.
Conduct a pre-checkout inspection
Before any equipment leaves your yard, perform a walk-around inspection with the customer present. Document the equipment’s condition on the form, noting any pre-existing damage. Photos are even better—take them on a phone or tablet and attach them to the order.
Verify customer identity
Don’t just collect a name. Verify the customer’s identity with a driver’s license or government-issued ID. This protects your business from fraud and gives you a verified point of contact if issues arise.
Pro Tip: Quipli offers built-in license scanning and verification through an integration with IDScan.net. It works both online and in-person, with no per-scan charges, helping you verify customer identities automatically and reduce fraud risk.
Review before releasing equipment
Make it standard practice for a manager or senior team member to review completed checkout forms before the equipment leaves. A quick review catches missing fields, unsigned sections, or incorrect pricing—saving your team from headaches down the line.
Use checklists for complex rentals
For larger orders or high-value equipment, use a supplementary checklist that accompanies the checkout form. This ensures attachments, safety accessories, and manuals are all accounted for.
Recommended Resource: How to Track Your Rental Inventory with Excel or Google Sheets (With Free Spreadsheet Template)
Equipment Rental Checkout Form Best Practices
Beyond getting the basics right, several best practices distinguish good checkout processes from great ones.
Keep it simple, but thorough
The best checkout forms strike a balance between thoroughness and ease of use. If your form takes 20 minutes to complete, your counter staff will start cutting corners. Aim for a form that captures everything you need in under 5 minutes.
Standardize across your team
Everyone on your team should follow the same checkout process, using the same form, every time. Inconsistency is where errors creep in. Write a brief standard operating procedure (SOP) for your checkout process and include it in new employee training.
Include visual documentation
Photos of equipment at checkout can save you thousands of dollars in disputed damage claims. Many rental operations now take timestamped photos of each unit before it leaves the yard and attach them to the rental order.
Capture digital signatures
Paper signatures work, but digital signatures are faster, more secure, and easier to store. They also eliminate the risk of lost or illegible forms.
Set up automated reminders
Late returns are a common pain point for rental businesses. Tying your checkout data to automated reminders—via email or SMS—helps customers return equipment on time and keeps your fleet available for the next rental.
Track checkout data over time
Your checkout forms aren’t just for individual transactions. Over time, the data you collect can reveal patterns—like which equipment types have the highest damage rates, which customers are consistently late, or which rental periods are most popular. Use this data to refine your processes and pricing.
Managing Multi-Location Checkout Forms
If you operate multiple locations, managing consistent checkout forms becomes significantly more complex. Each location may have different staff, slightly different processes, and their own fleet.
Here’s how to keep things consistent across locations:
- Use a single, centralized form template: Every location should use the same form. If one location adds a field or changes the layout without telling anyone, you end up with inconsistent data and confused customers who rent from multiple branches.
- Standardize naming conventions: Equipment categories, condition ratings, and fee structures should be identical across locations. When a customer rents from Location A and returns to Location B, your team needs to be on the same page.
- Centralize your data: If each location stores checkout data in its own spreadsheet or filing cabinet, you’re creating information silos. Centralizing data in a unified system gives you complete visibility across your entire operation.
- Conduct regular audits: Periodically review checkout forms from each location to ensure compliance with your standards. This is also a good time to gather staff feedback on what’s working and what needs improvement.
Pro Tip: Quipli’s unified platform gives you real-time inventory visibility across all locations, so your team can check availability, manage transfers, and maintain consistent checkout processes from a single system.
How to Automate Rental Checkout Forms With Quipli
If you’re looking for more than just an equipment checkout form template and want a fully integrated checkout system that makes managing your rental operation simple, Quipli can help.
Quipli’s unified platform replaces paper forms, spreadsheets, and disconnected systems with a streamlined digital checkout process that handles everything your team needs:
Seamless online and in-person checkout
Customers can browse your live inventory, select rental dates, review pricing, upload proof of insurance, sign contracts digitally, and pay—all from your e-commerce storefront. For walk-in customers, your counter team processes rentals through the same integrated system.
Built-in identity verification
Quipli includes license scanning and verification both remotely and in-person. Online customers receive a text to scan their license after checkout, while in-store staff can verify licenses with a physical scanner—no per-scan charges, no third-party headaches.
Real-time inventory tracking
Know exactly what’s available, what’s on rent, and what’s due back across every location. Unit statuses update automatically based on rentals, returns, and service schedules, so your team always has an accurate picture.
Automated invoicing and payment collection
Quipli generates invoices automatically, supports automatic payments charged to the customer’s card on file, and sends past-due reminders via email or SMS—reducing the time your team spends chasing payments.
Integrated service and repair tracking
When equipment returns for maintenance, Quipli’s service and repair module lets you create work orders, track parts and labor costs, and schedule preventive maintenance—all connected to the same equipment records used during checkout.
Customer self-service portal
Your customers can log into their portal to view active and past rentals, request extensions, download invoices, and make payments—freeing your team from routine admin tasks.
Final Thoughts
Your equipment checkout form is one of the most important touchpoints in your entire rental operation. It’s where expectations are set, accountability is established, and your equipment’s safety begins.
Whether you’re running a 50-unit general tool shop or a 500-unit heavy construction fleet, the fundamentals are the same: capture the right information, keep it accurate, standardize the process across your team, and make it as easy as possible for both your staff and your customers.
With Quipli, the checkout form is just the beginning. The platform connects your entire rental operation—from the first customer inquiry to the final invoice—so you can eliminate the silos, bottlenecks, and blind spots that hold rental businesses back.
Book a Demo and see how you can level up your rental operations with equipment rental software.